
 |
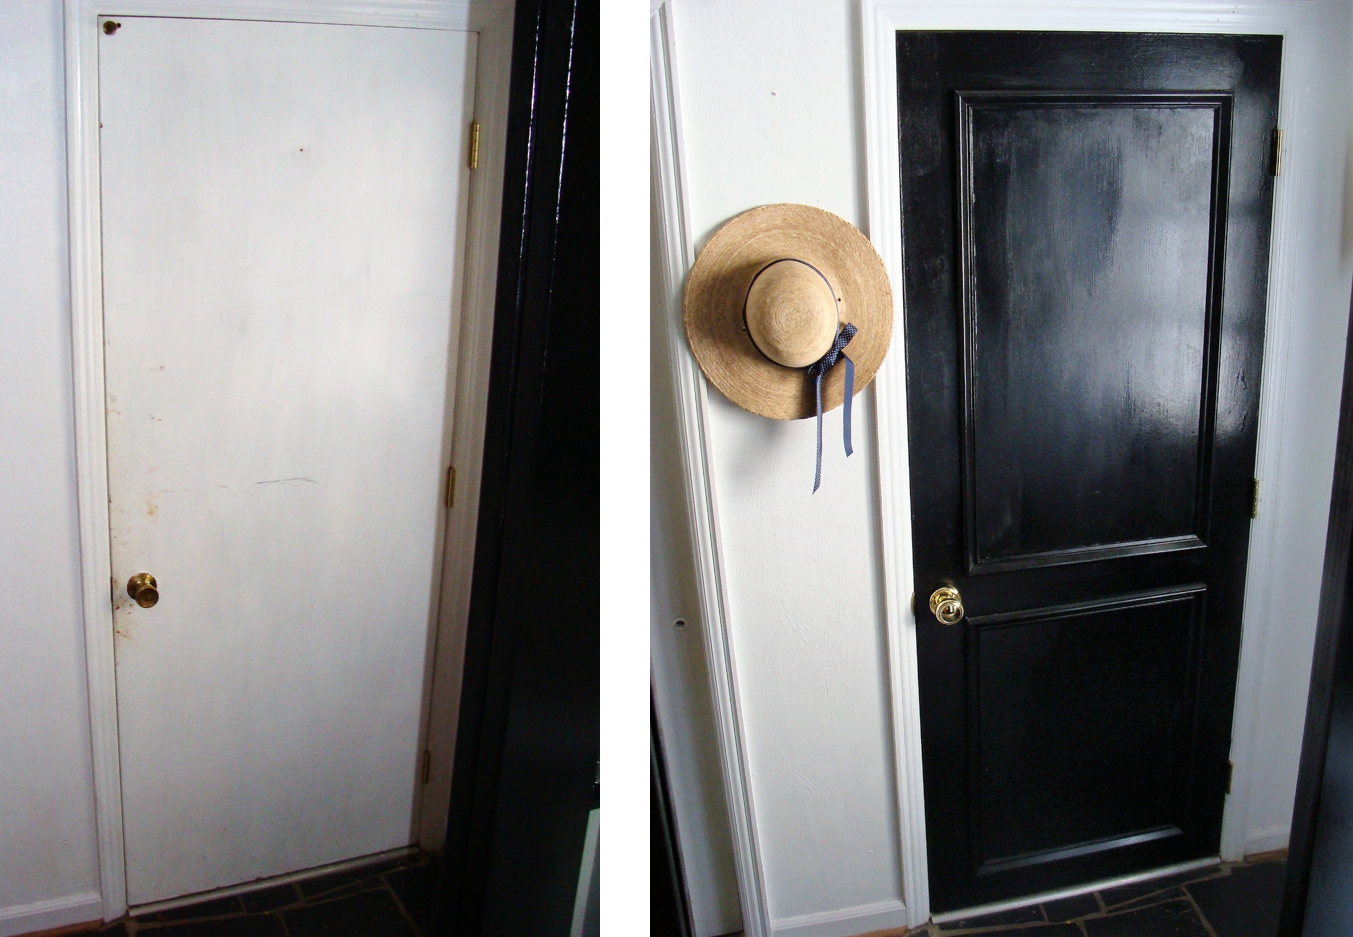
| Before After |
The plan was to fashion panels out of moulding, top and bottom to keep it simple, and paint the doors gloss black with good Benjamin Moore paint, and add Baldwin Brass hardware, including hinges. It turned out perfectly, and was good recycling. I hated the idea of all those doors going to the landfill!
 |
| Back of door - also a mess! Our girls are artists, and this Studio door shows it. We ended up having little fingerprints all over the house, but this door got the worst of it. |
The Project Begins...


First remove the old hardware. The hardware was ugly and paint covered. Upscale hardware will be the jewelry of this door, and will add some sparkle and really make a big difference!
Next we are going to mark the locations for our woodwork to create the faux panel effect:


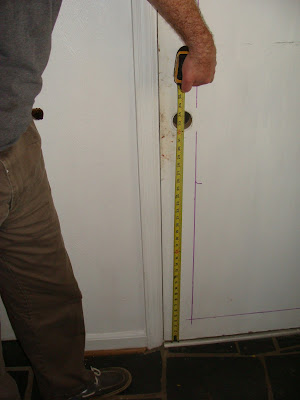
I used a combination square set at 4" and marked around all the door edges, sliding it and marking it with a Sharpie as it moved, but you can mark your 4" with a ruler or measuring tape and connect the dots with a yardstick if you like.
I suggest you use a pencil and not a Sharpie (my mistake) for marking unless you paint the door black, otherwise the Sharpie will bleed through your paint over time. Lesson learned! Once it bleeds through, it's very challenging to cover it up! It just bleeds through the second and third coats until you get ticked off and you hit it with some Kilz primer, and even then... Fortunately, we had always planned for these doors to be black, for a luxe effect.


If your door is still hung on the frame like mine, you will need to use a tape measure to mark 4" from the right and bottom sides of the door, and connect the dots with a ruler.
 |
| To mark where the middle moulding will go, center the tape measure with the #2 in the center of the doorknob opening, and mark 2" up and down from there on the pencil line to create a 4" center rail. If you are a little off, no big deal, nobody will notice. |

Measure the middle woodwork marks you just made, and transfer those marks to the right side of the door.


Measure your lines. The shorter horizontal pieces will be the same length top and bottom, the vertical pieces will be different lengths top and bottom. I made a quick diagram of the measurements so I could cut the molding correctly, showing the 45 degree angles of the cuts.


Using your combination square, mark the location and angle of the cut you want to make, and check it against your diagram to get the cut right. Measure off and mark the length you need, in this case 22" from sharp tip to tip (outside thicker dimension). We want the pointed ends of the cut molding to fit just withing the boxes we marked on the door. For non-woodworkers out there, the old saw is "measure twice, cut once" so you don't waste material.
 |
| You can make your 45 degree cuts with a cheap mitre box and saw like this, or with a professional chop saw if you have one. I didnt have a chop saw at the time. You can also use a finishing saw and cut without a mitre box, but it is more difficult to get the cuts to fit together snuggly, which is key to making this project look great. Note that the molding I've used is thicker on the outside edge (at the top of the picture), and tapered to thin out on the inside edge to create the faux captured panel look. |

The finished woodwork, lined up like soldiers, and ready to tack onto the door.


I used a silicone adhesive loaded into my caulk gun to apply in a zigszag pattern to the back of my molding, and pressed this snugly against the inside edge of the box line on the door. You can also use liquid nails or some other fast acting adhesive. The adhesive will hold the molding in place so we can tack the molding on with finishing nails later.


The nails should be set into the wood with a nail setter once the glue has dried so they don't show, prior to painting. Note the moulding is positioned inside the box with the mitre cuts facing inward.

I found the little molding buggers were shifting a bit as I positioned them, prior to tacking them in place, so I used electrical tape to help with the hold until the glue set. The glue together with the nails should create a good strong hold.
Once the glue sets, and the moulding has been nailed, if there are any small gaps at the mitre or between the door and moulding, you can use the silicone caulk or other caulk to fill the gaps, and wipe away the excess with a finger prior to painting.


Once the glue set, the door was painted with Benjamin Moore Impervex High-Gloss Enamel latex, Black N30980 from the shelf (not custom mixed). I painted along the grain of the wood (pic above right), had the door been a wood door and not hollow core, to complete the illusion of a solid wood door. I covered the hinges with blue painter's tape for a clean paint job. When the paint was dry, I installed the new Baldwin Brass hardware.

The finished door. The illusion is complete.
 |
A closer look at the solid brass hardware and the moulding. The jewelry helps make these doors shine!
One thing I learned from 20 years in the furniture industry, a bit of the really good stuff, like Baldwin Brass knobs, really elevates the entire room, despite the rather humble pedigree of these doors!
|
No comments:
Post a Comment